Wooden NOEL Christmas Craft
I have a great Christmas craft tutorial for you today. Something simple and chic and made by you! There is nothing like adding an extra piece to your holiday collection and this Wooden Noel Sign is just perfect for that. This little piece came be completed in just a few hours and is a fabulous addition to any mantle, sideboard, table and more! So grab your materials and get started!
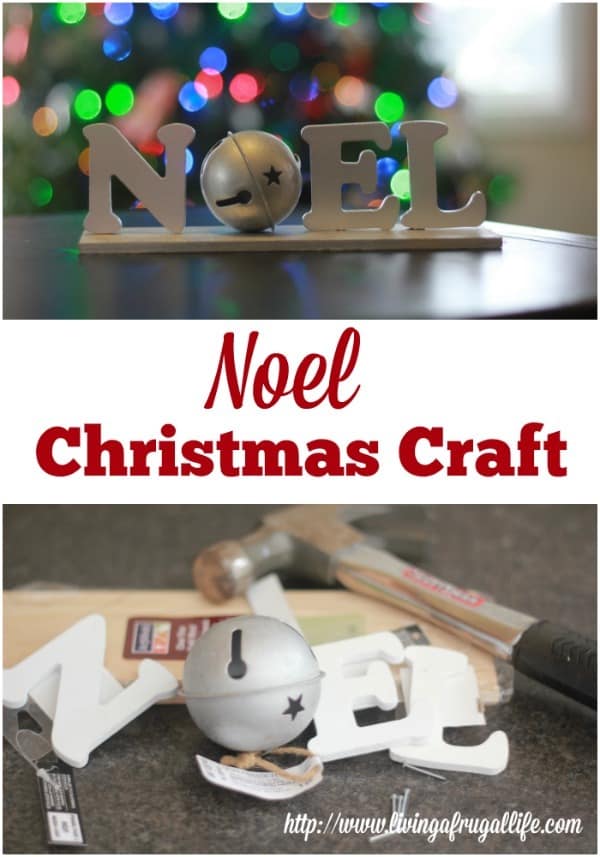
Wooden NOEL Christmas Craft
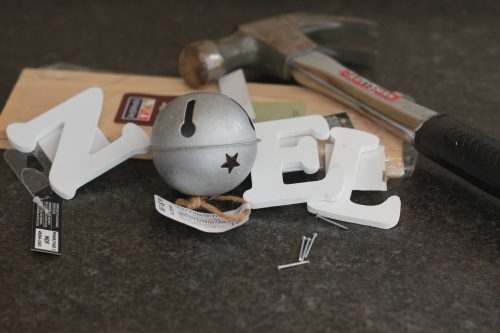
Materials needed:
- Small piece of wood- long enough to fit your letters (depends on what font and size you choose) you can
- also, buy little-precut wood strips in packages at the craft store –that’s what I did- no cutting necessary!
- Wood letters N, E, and L
- Hammer
- Nails
- Wood glue- or glue gun
- Paint- I used spray paint (silver)
- Silver Bell
Tutorial:
Step 1 – Line up your letters on your flat piece of wood, space them apart to your liking, making sure to
leave a spot between the N and the E for the bell (measure that out).
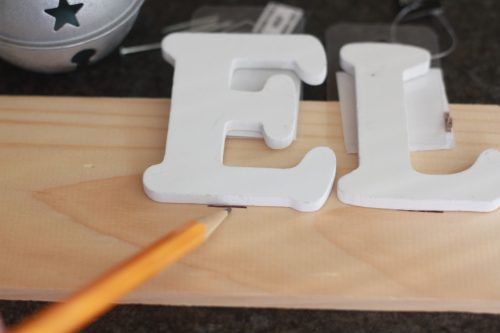
Step 2 – Draw a line on your wood where the nail for each letter would need to be, make sure you find
the thickest part of the bottom of each letter to avoid splitting your wood. If your letters are thin I
would suggest just using wood glue or a glue gun to avoid this all together! Plus it is easier and pretty
secure.
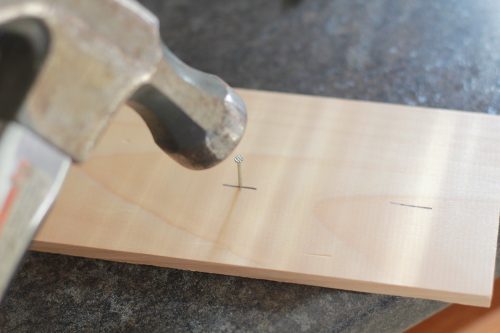
Step 3 – Put a nail through each marking make sure each one goes all the way through your bottom
piece.
Step 4 – Remove the nails and put them through the holes on the opposite side (reverse them)- this way
your nails and letters will be in the actual position you wanted them in.
Step 5 – Place the letters on top of each nail and hammer them slowly in- it works best if you use a piece
of wood between the hammer and the letter to avoid breaking your letters- this distributes the weight
and the blow. Again , if you have thin letters just skip the nails and glue, glue, glue.
Step 6 – Once all your letters are in place and your glue dry (if you used it) paint your project and let it
dry. Remember to get all the crevices in the letters, and on the back , front and sides!
Step 7 – Secure your bell between the N and the E of your piece. I liked how mine looked on its side. I
would suggest using some type of glue for this since there isn’t a high likelihood that the hole of your
bell will be touching the wood- plus it would be less secure and rather mobile with a nail.
Step 8 – Display your lovely Wooden Noel Christmas craft in your home or give it to a friend.
There you have it! This is a quick and simple Christmas craft that is also easy on the wallet. Make the season brighter with this handmade wooden Noel sign!

