How to Build A DIY Free Standing Single Shelf or Multiple Shelves
Have you ever made freestanding shelves? When we found out we were expecting our fourth baby, I began to look at the kids room in our 2 bedroom duplex, and try to figure out what we were going to do to be able to fit another body into the little room. I quickly realized that we were not going to have room for everyone and all their stuff and that we were going to need a DIY freestanding shelf or 2.

So I began to search out my options. I decided to redo the closet set up and to do that, we needed an extra DIY freestanding shelves on top of the one currently built in. As I searched for premade ones, I realized that there was nothing out there that was just a single shelf. so we decided to make it from scratch with custom measurments from our existing shelves.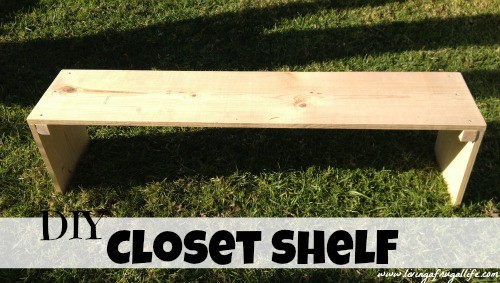
How to make DIY Freestanding Shelves
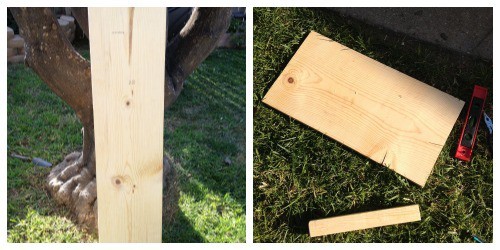
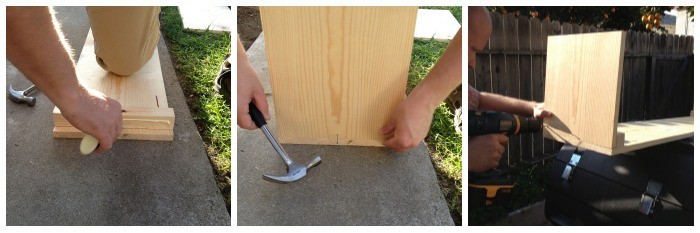
Step 1- Buy the wood you would like for your shelf. There are lots of choices so you have to decide the type and length to get. Cut the board into lengths needed for the length and height of your shelf. Gather nails, screws, a drill, a level, wood glue, and a hammer.
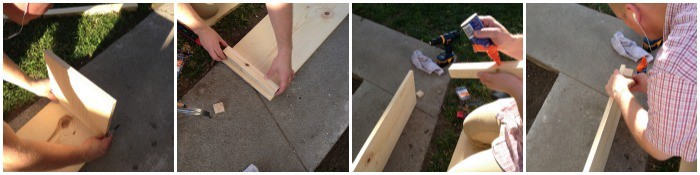
Step 2- Measure the leg board on the shelf board to know how far in to put the brace then draw a line on the board to show where the brace needs to go. Put wood glue on the brace board and line it up on the side of the line so you leave enough space for the leg to be attached
Step 3- Turn the board over and place it brace side down. While keeping the board straight nail in a short nail to hold it straight until you put the screws in. Drill holes and add 3 screws to hold it secure.
*repeat steps 2-3 again on the other side of the shelf.
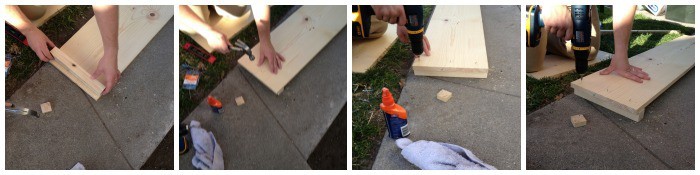
 Step 4- Turn the board back over and put wood glue on the side of the brace board. Line up leg and nail a couple nails to hold it on. Drill holes for screws. Add screws to make it secure. At this point, you can remove the nails if you want or hammer them all the way in for added support.
*repeat this step on the other side
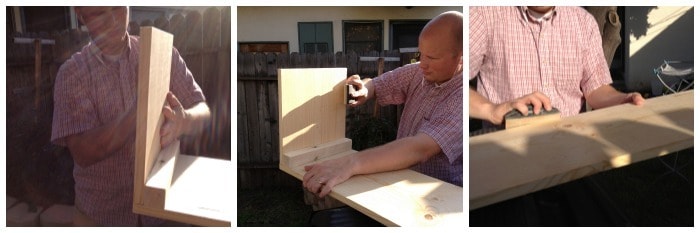
Step 5- Sand all sides of the shelf and paint if you want it painted.
Now it is ready to be put on your DIY freestanding shelves. This has helped us a ton in giving us more space in our closet and room.
What ideas do you have for adding more space in your closet?


One Comment